Gyspy Boxers
Update as of August 2020: This was originally posted on my now defunct tumblr blog. I am consolidating all of my old posts for posterity and updating the posts as I see fit for the new layout and style of this space.
You may view the original post here.
Pattern Details
- Pattern Name
- Gypsy Boxers by Doris Chan
- Yarn Used
6ply Hand Dyed Cotton from Chumpling Crafts in Ice Cream (Pastel) - Cheese
- Hook Size
4.5mm
- Finished Size
- S
- Ravelry Entry
- Gypsy Boxers
I have always wanted to make some shorts again but I couldn’t find a pattern I liked. I actually thought about coming up with my own but I don’t have enough courage to come up with one yet. I did come up with my own crochet shorts before, but I had a lot of problems with the shaping.
So when I saw this pattern from a copy of Interweave Crochet, Summer 2014 that I got from Booksale, I knew I had to make it. It’s a very simple yet ingenious pattern. It uses a relatively thin yarn and a big hook to give it a more lacy feel, and it also works up really fast because of that.

I like how Doris Chan gives notes and tips while you’re working the shorts. She writes that you don’t have to make a swatch beforehand. I hate making gauge swatches. You just need to make a certain number of stitches, if it fits your waist, you’re good to go. And after certain rows, she tells you where you are exactly on the shorts, for example:
At this point, the pants are mid-rise, designed for the waistband to hit at or just below the navel. I suggest that the largest size, add a bit more length here, about 1″.
These notes are really helpful to check if the shorts fit you well from time to time. The pattern is worked top down in the round using 2 pattern rows featuring alternate shells and V-stitches. Here’s a closeup of the pattern stitches.

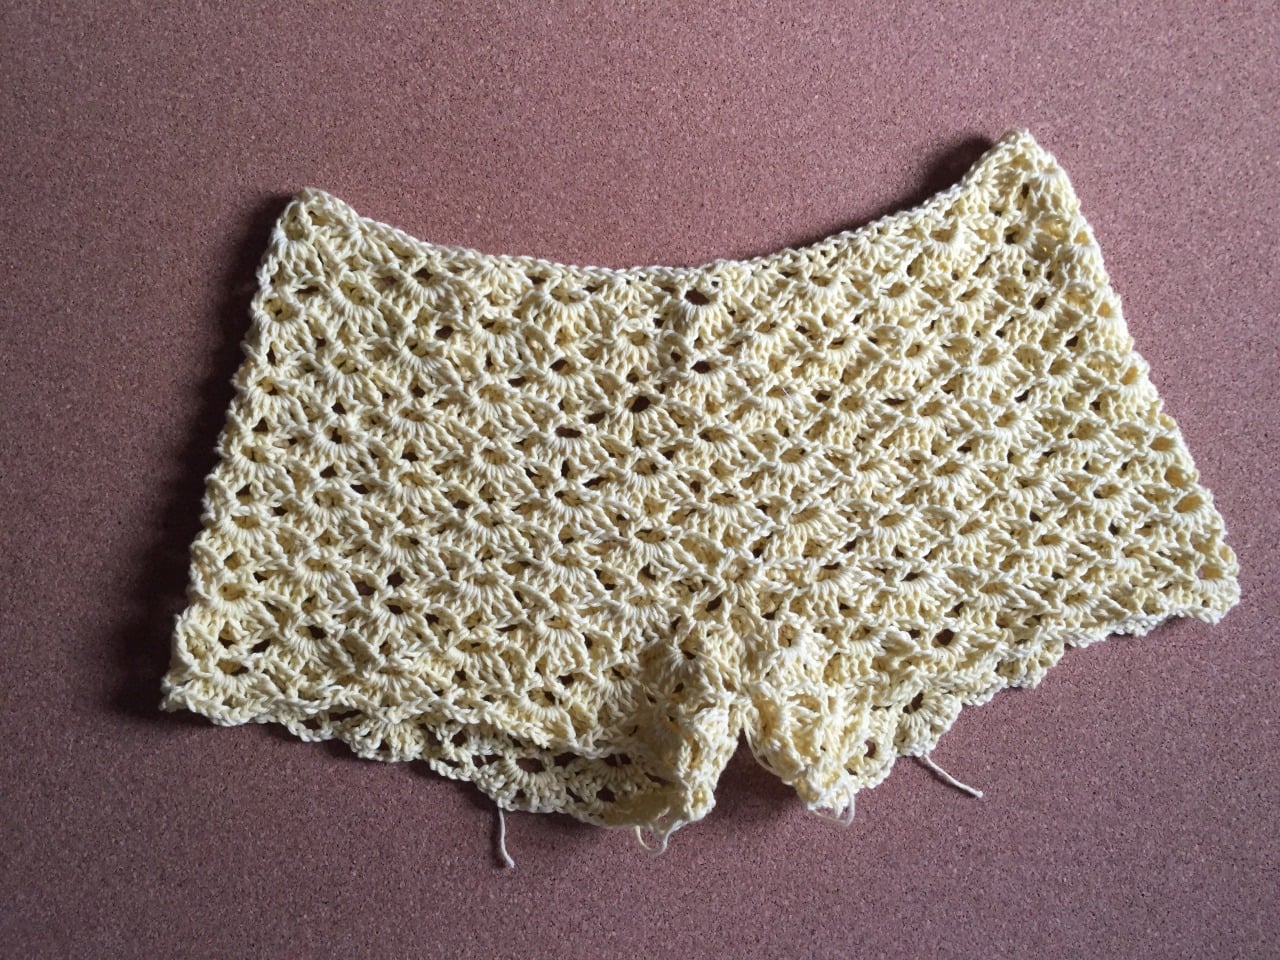
The increases for the butt area are made using fans which is really clever. The crotch area is worked as a series of short rows using the same design. Pictured below is what it looks like after the divide for the legs are joined with the crotch.

For the legs, I shortened mine about an 1″ shorter because I want my shorts really tiny. The length can be customized to any length by adding more rows. If I find my shorts really short in the future, I can just add another row or two, maybe in another color to make a cute trim.
For the waistband, elastic is added for it to bounce back. I couldn’t find an elastic sewing thread, but I got myself two rolls of elastic nylon used for making bracelets. I got these from Carolina’s SM Megamall at P35 for the 1.0mm and P40 for the 0.8mm.

So, I thought I bought enough but I only had enough to make a row and a half. Because the elastic is transparent, it isn’t visible from afar.

I’m still looking for better elastic alternatives so I can finish the waistband. Hopefully that won’t take long because summer is almost over!